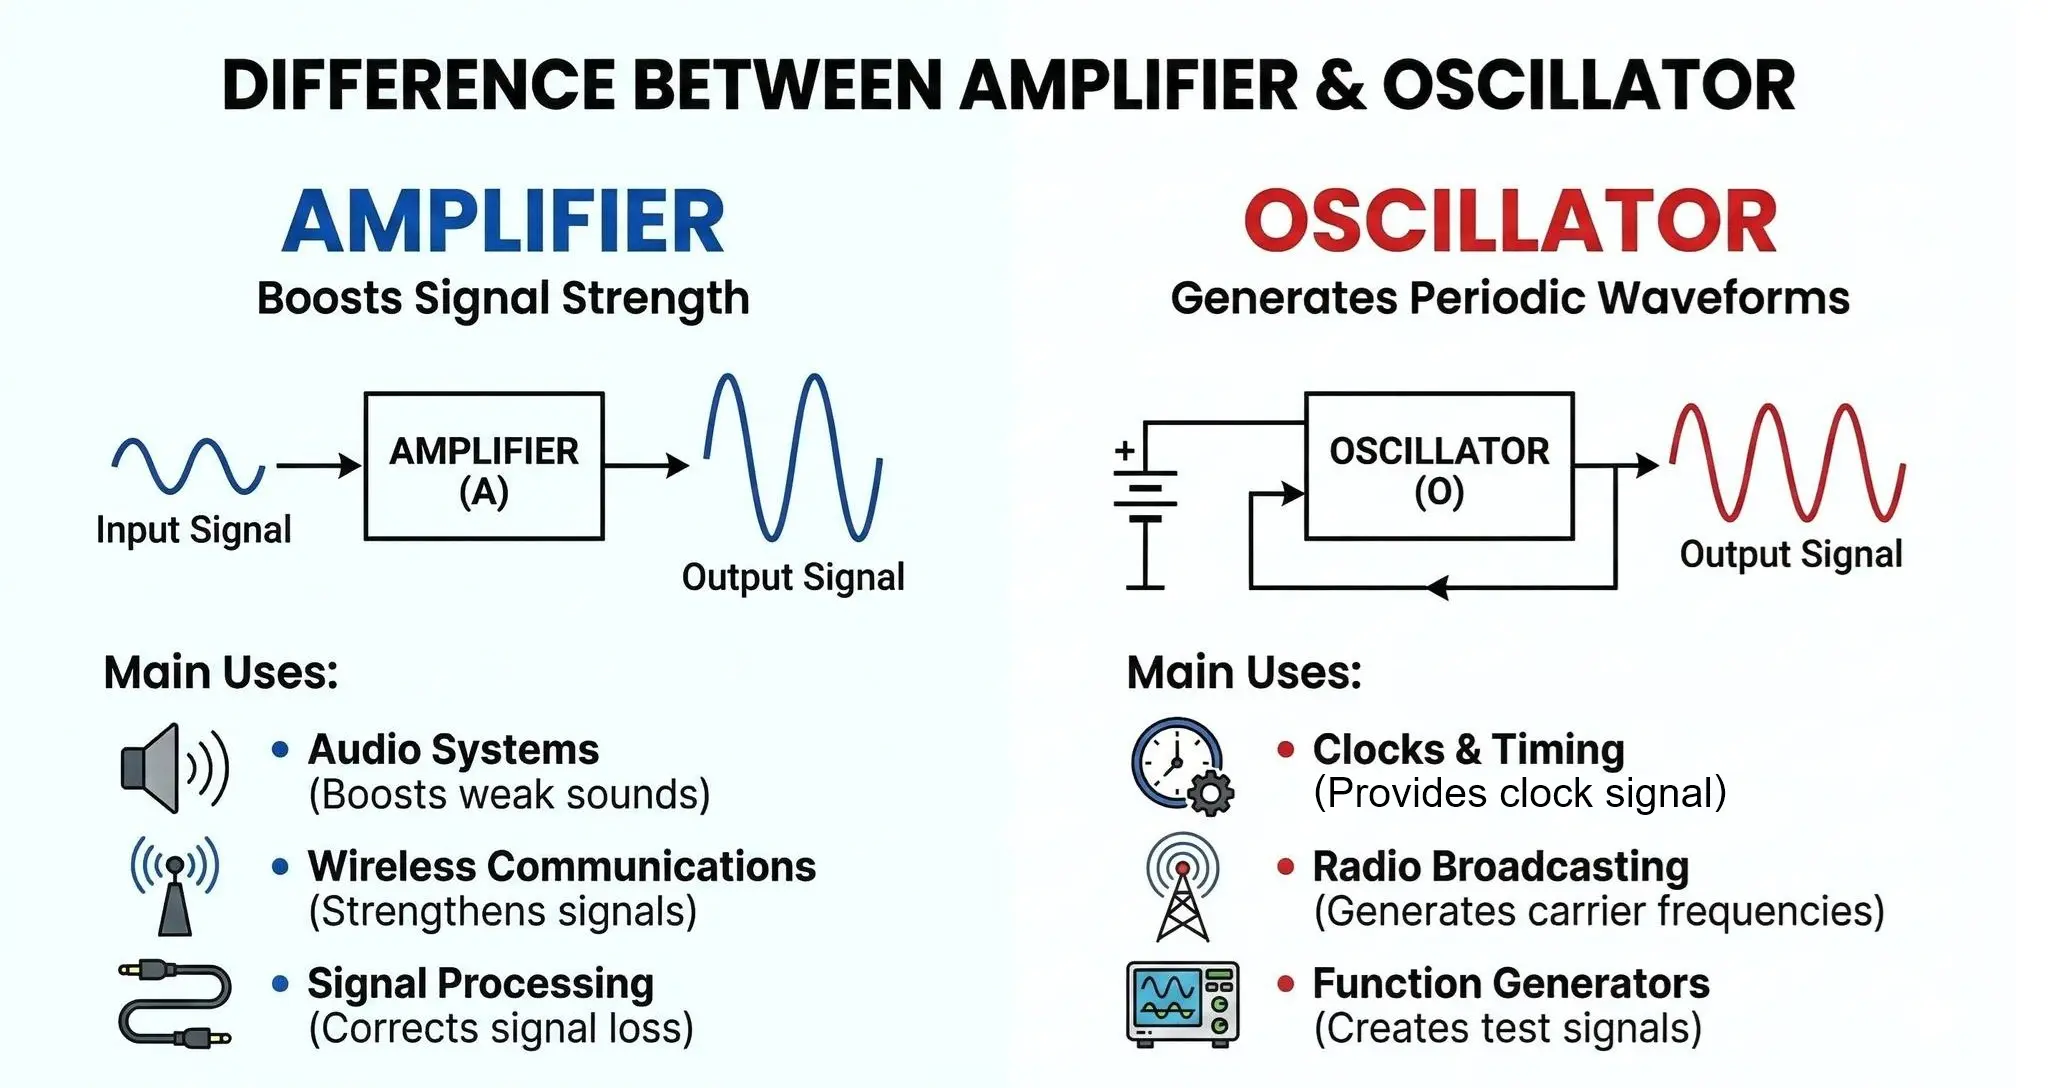
Difference Between Amplifier and Oscillator
In electronic systems, signals are often required to be either strengthened or generated. Two fundamental circuits that perform these roles are the amplifier and the… Read More »Difference Between Amplifier and Oscillator